Archive for perishable

Getting Started with Home Beer Brewing

Usually I’m the one in the house working on crafting and Do-It-Yourself projects. But when I saw my husband, Lee getting his beer brewing supplies ready for the next batch I begged him to write a special blog for my site.

I’m a complete beginner to brewing beer at home. There are a lot of different brewing techniques and virtually endless number of beer and ingredient combinations. Beer supply stores both local and online sell kits that include everything you need to get started. These can range from around $75 dollars all the way up to $300-$400 for an all grain starter kit. For myself, I bought just a cheap kit with the plan to build on as my interest grew. This has been a really fun new hobby and I have pretty much dove in head first.

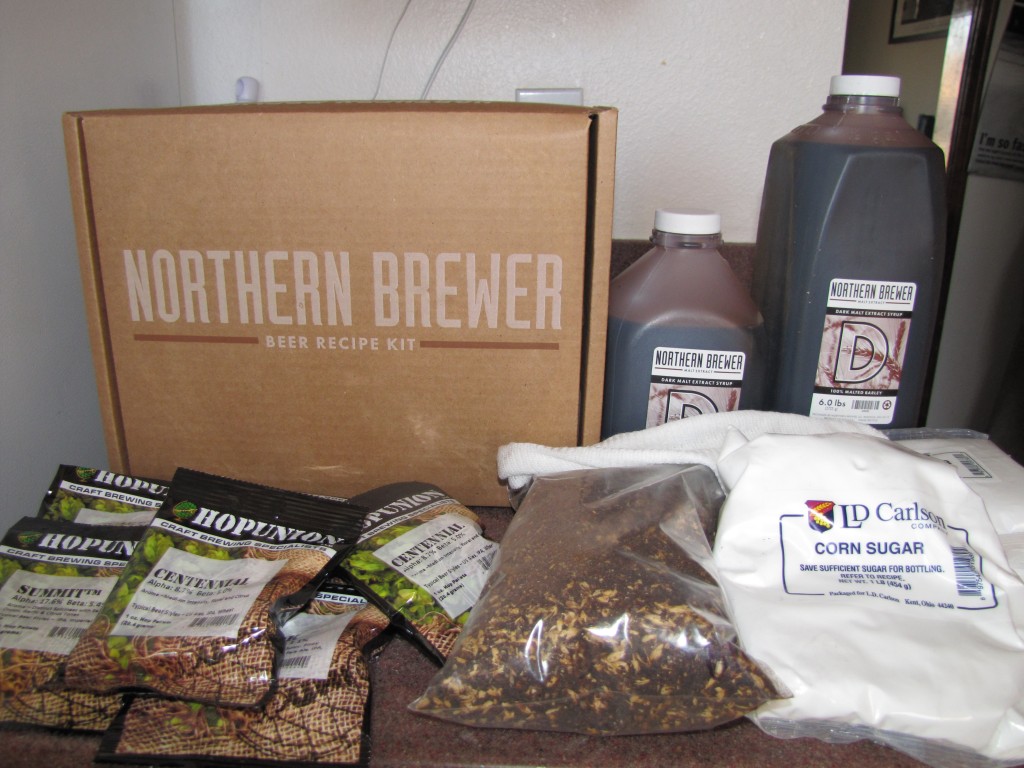
Today, I’m brewing a Black IPA. A Black IPA is hopped like an IPA but with a rich dark malt rather than pale malt. As you might expect, brewing different types of beer, there are different processes for each. As compared to other kits this is a pretty intense with 2 malt additions, 6 hop additions (plus dry hopping), and a corn sugar addition.

As we go through the process I’ll try to keep the process relatively general. This will just barely scratch the surface of home beer brewing…there’s lots to learn.

Getting Started:
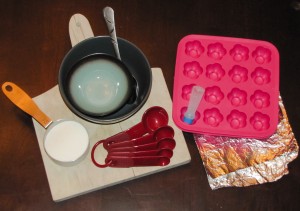
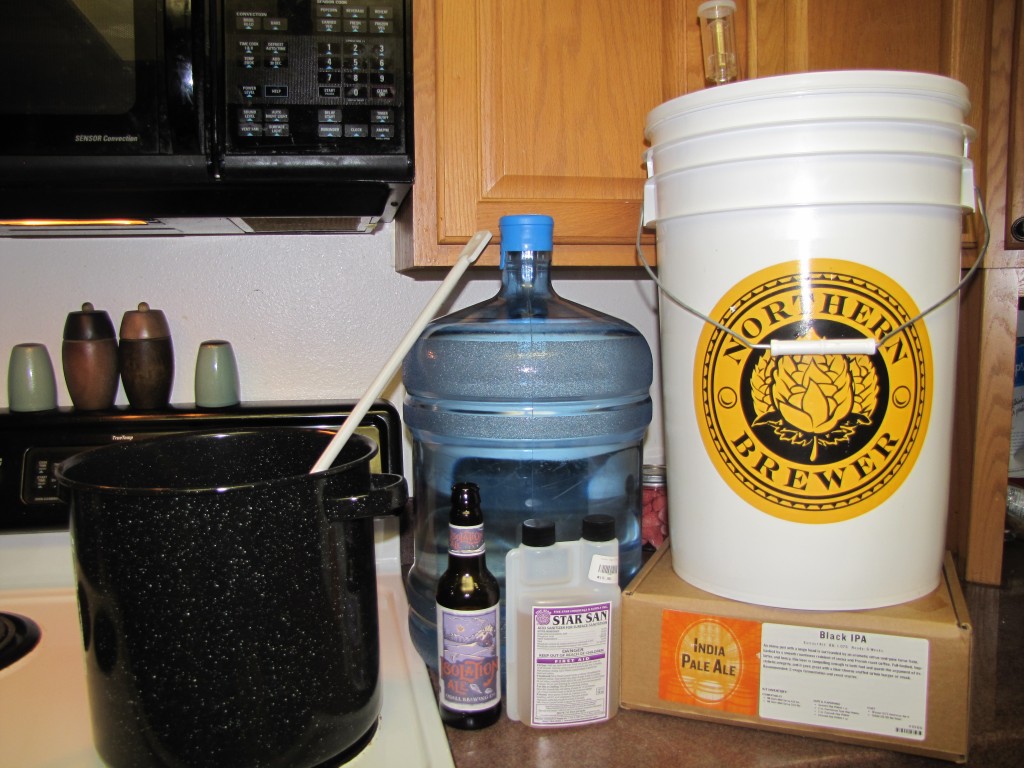
First things first, take an inventory and make sure you have everything you need. Your beer kit will come with all the ingredients you need, but also make sure you have sanitizer, ice, good quality water, etc. You won’t be able leave during the boil so it is absolutely necessary to have everything.

Beer Brewing
Ingredients:
Specialty Grain
3.15 lbs of dark malt syrup
6 lbs of dark malt syrup
1 lb corn sugar
1 oz Summit hops
1 oz Chinook hops
1 oz Centinnial hops
1 oz Cascade hops
1 oz Centennial hops
1 oz Cascade hops (dry hop)
Safale US-05 Ale Yeast

Other Stuff:
Kettle at least 3.5 gallons
Mesh Grain Bag
Star San Sanitizer
Timer
Ice
Beer to Drink

Beer Kit Ingredients

If you have everything you need now’s the time to crack a beer and let’s get started.

Make the Wort:
These steps apply if you’re making beer with an extract kit. If you’re going all grain you’ll have to extract the sugar from your malted grains first.

Beer Pre-Boil

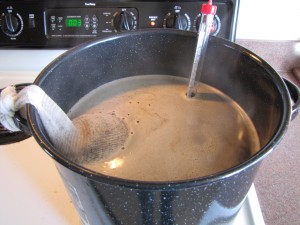
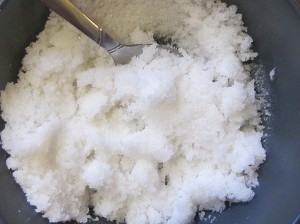
Start by measuring out about 2.5 gallons of water. I use bottled spring water. Tap water will also work fine as long as you have good tasting water. Start heating the water in your boiling kettle. If you have specialty grains in your kit, now is the time to add them. Place them in the mesh grain bag and hang them off the side to steep just like tea. After about 20 minutes or once the pot reaches 170 degrees remove the grains. Bring the pot to boil.

Once it reaches boiling it is time to add your first round of malt extract. First remove from heat. This prevents any of the malt extract that might reach the bottom of the pot stick down there and burning. Pour the malt extract in slowly slowly and stir to combine. Once it’s fully mixed return to heat and to boiling.

Add Malt

Congratulations, you now have what’s called the “wort” – a brewers term for unfermented beer.

The Boil:
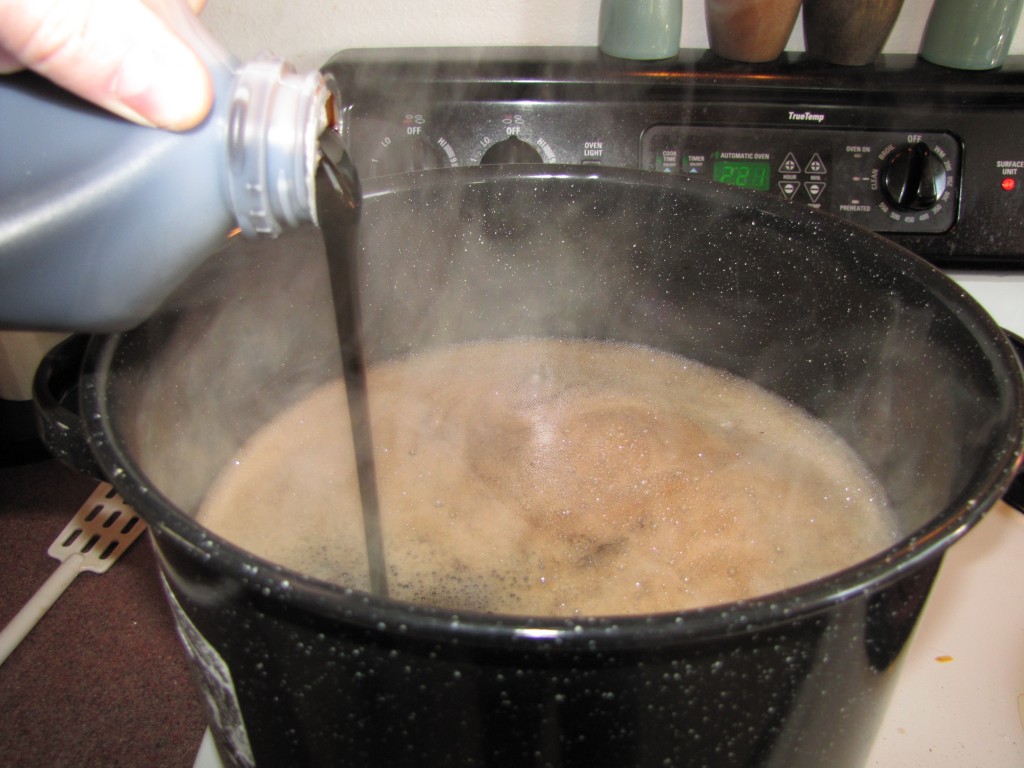
Once you get the pot to boil again you’ll usually be instructed to add hops. You will add hops throughout the boil to allow the beer to take on the unique characteristics of each type of hop and blend with your malt. Follow the instructions on your kit for hop addition times. For this Black IPA, add the Summit hops and set the timer to 60 minutes.

Watch out for boil overs! While this won’t ruin your beer it will leave a sticky nasty mess for you to clean up. If you think the pot is about to boil over reduce heat and stir the wort.

Sanitize
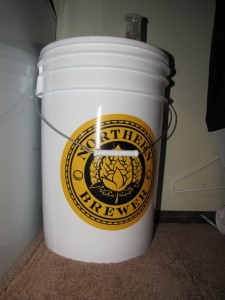
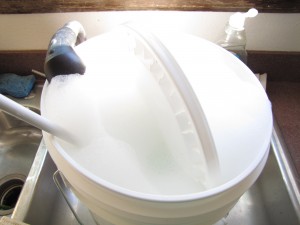
While you’re boiling it’s a good time to start sanitizing your primary fermenter and anything else that might touch the beer after boil. I usually just fill the fermenting bucket with water and Star San and throw everything else that needs to be sanitized in the bucket.

With 15 minutes left it is now time to add more hops and malt extract. I quickly stirred in the malt extract and added the recommended hops through to the end of the boil. There is also a late addition Corn Sugar added, my first experience with Corn Sugar.

Cooling the Wort:
Next step is to cool your finished wort as quickly as possible. The most convenient cheapest way to do this is a simple ice bath. I put the boiling pot in the sink and fill it with ice and a bit of water.

Cool Wort

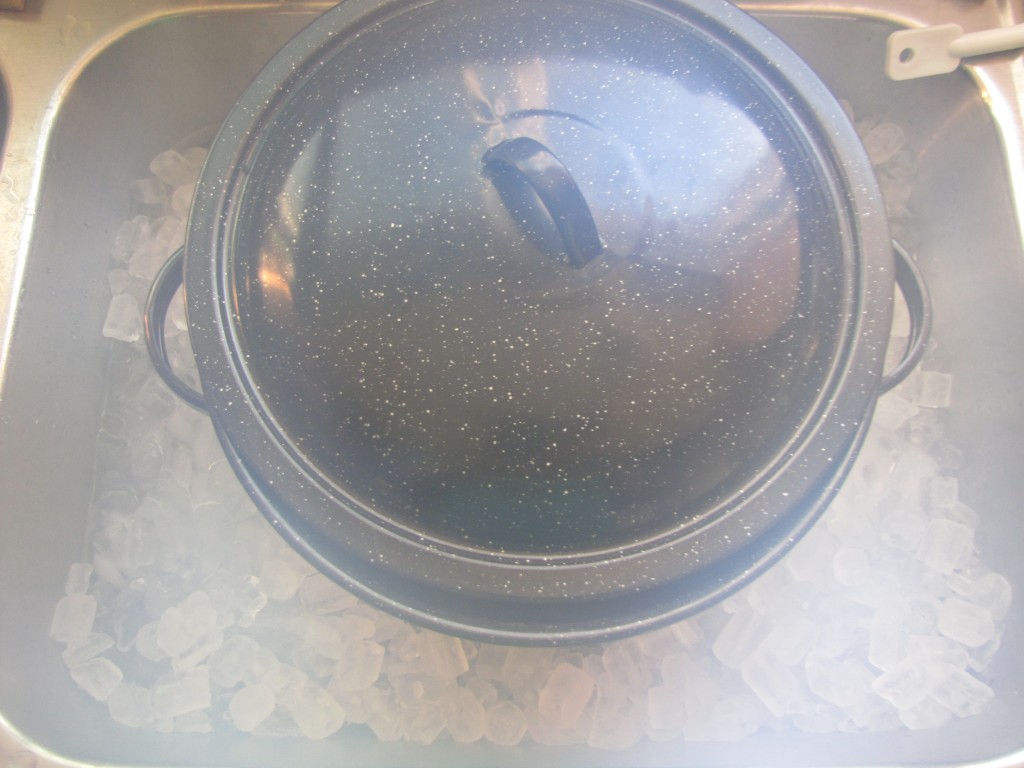
We need to get the temperature down to 100 degrees as fast as possible. Since the wort is no longer boiling it’s fully open to contamination by anything that might find its way into it. Leave the pot covered and open just a crack to allow steam to escape. This normally takes around 45 minutes.

Move Wort to Fermenter:
Next step is to move the beer to the primary fermenter. Empty out your sanitized fermenting bucket and fill with 2 gallons of water. Pour in your cooled wort, and then fill with water to reach 5 gallons. Agitate the wort to oxygenate it by rocking the bucket back and forth.

Pitching Yeast:
Time to add your yeast. Depending on what kind of yeast you are using, you may have had to activate the yeast prior to brewing. With the Black IPA kit I used dry yeast. Many kits will recommend you pitch it directly into the wort. In the book “How to Brew” by John Palmer, he recommends rehydrating the dry yeast before pitching it. I tried this out for the first time with this batch, and we’ll see how it works out. I would highly recommend this book for anyone that wants to expand their knowledge beyond the standard brew kit instructions.

FermentationFermentation:
Place the top on your fermenting bucket and seal all the way around. Add some water to your airlock and place into the whole in the lid. Move the bucket to a dark, undisturbed location with temperatures that are regularly between 60-70 degrees. Depending on the type of beer you’ll need to let it ferment at least 2 weeks in the primary fermentation bucket. Most recipes also require secondary fermentation. If you don’t have a secondary fermenter you can sometimes leave it in the primary for an additional week or two to finish fermentation. This Black IPA will require secondary fermentation in a separate fermenter where it will be dry hopped.

Bottling:
Bottling or kegging your beer is the last step. I won’t cover much on this here, but I can tell you the key is to be very clean. Clean and sanitize everything extensively to eliminate any contamination. After 1-2 weeks of bottle conditioning you’ll be ready to enjoy the fruits of your labor.

New Year, New Juice Fast

IMG_1581This is not exactly crafty but it’s the start of a new year so of course I, like most women, have made big promises of healthy eating and exercise. I decided to start the new year off with a juice fast that worked really well for me last summer and I thought I’d share the experience and some tips that hopefully will motivate and help you as well.

Last summer (while eating a giant bowl of Kraft Macoroni and Cheese) I watched a documentary on Netflix called Fat, Sick, and Nearly Dead. Basically an Australian guy decides to stop eating fattening foods for 60 days and drink nothing but liquid veggies for breakfast, lunch, and dinner under the supervision of a nutrionist. Despite that fact that he’s a FAT AUSTRALIAN GUY, he travels to America and interviews happy fat Americans while he quickly and smugly slims down.

Joe: sipping juice “Are you ok with the fact that you will probably die before you are 50?”
Fat American: “What can I say it’s finger lickin good!”
I’m exaggerating, barely.

I will not spoil the documentary further by telling you how much Joe lost or the long term effects. I think it’s important to watch it if you decide to try juicing but I will share some tips and links so that you are prepared when you began juicing.

IMG_1587

Getting Started

Be Informed
First as I mentioned above you need to watch the documentary. My blog, although crucial to your juicing journey is not a substitute. If you do not have Netflix, you can also watch it for free here.

Medical Advice
Next, I recommend that you talk to your doctor about your plans and goals. They might tell you that you this is not the diet for you, or that you need to take a blood test like Joe did while you are on the diet. I did talk to my doctor before I started the juice fast. I showed her the recipes and talked to her about my weight goals and she did approve the diet as long as I “listened to my body.”

Buy a Juicer
Once you have consulted with a doctor, It’s time to invest in a juicer. Grasshopper, this is not the place to be thrifty. Decide what is most important to you before you purchase your juicer.IMG_1565Lee and I (mostly Lee) researched several juicers before we purchased ours.

Lee says: The two most popular types of juicers are centrifugal and masticating. Centrifugal juicers are most common and have a grinding disc and basket that spin at high RPMs to extract juice. Centrifugal juicers are usually less expensive but are not as good with leafy vegetables. The masticating juicer has a gear that essentially grinds and crunches the fruit fiber to extract the juice. The masticating process is generally considered to yield more juice than the centrifugal juicer. Masticating juicers also tend to be more expensive, have a longer life, and are not as good with fruit. There are many pros and cons to each. A good place to start your research is joyfuljuicer.com.

We picked up a Breville juicer which was the same brand Joe used in the documentary. The main reason we went with the Breville juicer was that it was affordable, versatile, and durable. The reviews were generally very good. We still use it about 2-3 times a week and it works great. However, our only complaint is that we hate cleaning it. – I’m not sure how to avoid that though.IMG_1548

Recipes
This site saved us in the early days of our Juice Fast. These are the actual juices that Joe used in the documentary. The first two are the ones that I personally like, the last two taste like dying!!! I also experiment a lot, usually when there are fruit and veggies that are going bad in the fridge. Most of the experiments are horrible.

Lee’s Ridiculously Sweet Pretend Coffee
10 strawberries
20 grapes
2 green apples
Yes, he actually counted these out every morning. It amazes me what you coffee fiends do to get your fix. It’s REALLY sweet but gives you a lot of energy. He said it gave him more energy then coffee. I read somewhere (or maybe I made this up) that it’s ok to start your juice fast with more fruit then veggies, especially if you have an issue with the taste. However, you want to slowly start adding more veggies into your drinks.

IMG_1524-EditedWhat I’ve Learned From Juicing

  • Don’t juice the lemons in the juicer, just squeeze them in. I juiced half a lemon by itself. It’s like 1 dropper of liquid. Whereas if you squeeze it…well it’s like a tablespoon, but still that little bit of lemon goes a long way to make your juice taste less like landscape. Especially during the early days of juicing
  • Personally I think that ginger makes no difference at all to the juice. Lee says it does but I think it’s because he knows I don’t put it in anymore and he likes to be ornery.
  • Nine times out ten if something tastes funny in your juice it’s the cucumbers. I always eat a little piece of my cucumber before I juice it.
  • Each recipe on the website link above makes about two servings. One “meal” for two people, or breakfast and lunch for one. You will very quickly learn that the worst part about juicing is cleaning the juicer, counters (and if you have a spouse, the cabinets) so plan ahead. Whatever you make is going to stay fresh for about 2-3 days. After that it’s going to turn brownish and start to taste awful, so decide how much you can drink in that time and make that much. This is a good way to stay on track and develop good habits. (oh man, no juice… oh well I’ll just eat this donut instead.. etc.)

What To Expect During The Fast

    • The first few days are going to be hard. You drinks taste like grass and you probably have to give yourself pep talks to get through them. You will think about chewing weird things like candles and fingers. You will have no energy. Your body is going to go through a detox, which will probably cause headaches. I felt like my brain was trying to evacuate my body. A lot of the foods you eat have preservatives and chemicals in them that make you addicted to crazy things like raspberry flavoring number 5. It’s hard but it only lasts for 2 or 3 days.
    • During those first 2 or 3 days, every show, book, song and store you drive by is going to be about food and you’ll find that nobody cares about your goals. It’s probably best to just stay in your room with the lights out. It might be the easiest way to contain your brain if it does escape anyway.
    • By day 5 you’ll start to feel better. You will find it difficult to finish your drinks because they will fill you up. If you do get hungry but don’t want to “eat”, make a veggie plate or a plain sweet potato. I did read a blog about someone that actually ate the pulp in the juicer… kinda weird but whatever gets you through the fast.

I lost about 20 pounds in 3 weeks on the juice fast. After that I started to incorporate healthy dinners into my diet, but I still had juice for breakfast and lunch for a week. Eventually I stopped juicing altogether, but I tried to watch my portions and still eat healthy foods. I found that I did not have issues with increased appetite like I normally experienced with other diets and I didn’t immediately gain the weight back like you might expect with a juice fast. Periodically, Lee and I have also done mini juice fasts that last 3-5 days and we always try to keep the ingredients in the fridge so we can substitute lunch or breakfast with juice anytime. It’s also a great way to just add veggies to your diet or deal with the munchies in between meals.

If you decide to try the juice fast, let me know how it goes and what your results are.

Do you take Sugar? One Lump or Two? – DIY Sugar Cubes


IMG_1313IMG_1323DIY Sugar Cubes


What you need:
½ Cup Sugar
2 teaspoons of water
silicone ice cube tray or mini candy moldIMG_1194 Edited

What I used:
(in addition to items listed above)
1 Bowl (more if you are making several batches)
1 spoon
1 teaspoon
Aluminum foil
Cutting board
Empty food coloring bottle purchased from King Soopers (Trust me you will want this!)
Airtight jar to store your sugar cubes

Airtight jars I used:
Ikea “slom” Jar
16oz Golden Harvest Jars
Upcycled Mason Jar from Tokyo Joe’s restaurant (which I turned into Snowmen.)

It’s important to complete this process quickly. The sugar water mixture dries quickly and it’s best to get it pressed into your molds before that happens. I recommend reading through this first before you start!

IMG_1165Combine ½ cup sugar and 2 TEASPOONS of water in a bowl and stir. Be sure to scrape the sides. 

The first blog I read just said to make a “sugar paste.” Trust me, 2 teaspoons comes from countless experiments. It might not seem like a lot of water but do not add more or you might not end up with sugar cubes, you’ll have chewy candy goo that never dries. If you get stuck or stop for any reason just stir your mixture a bit to moisten up any sugar that may get dry.

Using the measuring spoon, fill each mold with a 1 teaspoon sized scoop of the sugar mixture. Tightly press the mixture down into the the mold. IMG_1287 Edited-3

I spent a lot of time looking for something that would fit into the molds (and was sanitary). I had a lot of sugar cubes that dried and fell apart because I couldn’t get the sugar packed tightly enough. If you have a King Soopers near by, I strongly recommend that you buy their store brand of food coloring bottles for this project. They may save you a lot of time and frustration. The top of the bottles fit into the corners of each one of the silicone molds that I have used.128821 128811

Once you have all of your sugar cubes packed tightly into their molds, you want to flip them out. Place aluminum foil and the cutting board over the top and flip the mold over. Lift the mold and cover with aluminum foil . Let the sugar cubes sit until dry (usually overnight).

The first 10 or so times I didn’t think to add the cutting board. I broke about 15% of the sugar cubes. However, once I incorporated the cutting board into the process, I never broke a cube again. (Ali, dumb) Unless you have lightening fast flipping skills, I recommend that you don’t skip this tool.

I usually check on them about 12-24 hours later. I just push on a sugar cube, if it breaks they aren’t done. If it holds firm… Congratulations! You made sugar cubes!


IMG_1312
Try thisIMG_1356 EditedIMG_1363 Edited-5

  • add food coloring to make colorful sugar cubes
  • Substitute raw sugar or other types of sugar.