
 Lately I’ve been staring at the walls in my house. I want to be one of those people who has interesting walls with fantastic art. But I have a budget and I am not really that good with decorating. My mother calls me “beige” and I suppose it’s true. When I saw this fantastic project on Pinterest I thought it was something even I, with my severely limited artistic ability could do and it seemed like something that would fit in with my tastes considering my love of neutral colors.
 I love the piece above my couch but I haven’t been able to find something that I love just as much for the space above my TV, so it’s sat empty for over two years. I hoped this project would fill that space.
To make this be a tutorial it would be something like the blind, deaf, and dumb leading…someone who likely has more skill than me. So instead, I will just tell you what I did and hope it helps you not make the same mistakes.
The first step was the base coat of the canvas. I wanted it to have a ombre effect so I used about four coats of Rustoleums’ Almond Spray Paint and two coats of Design Masters’ Copper Fusion Spray Paint to get this look: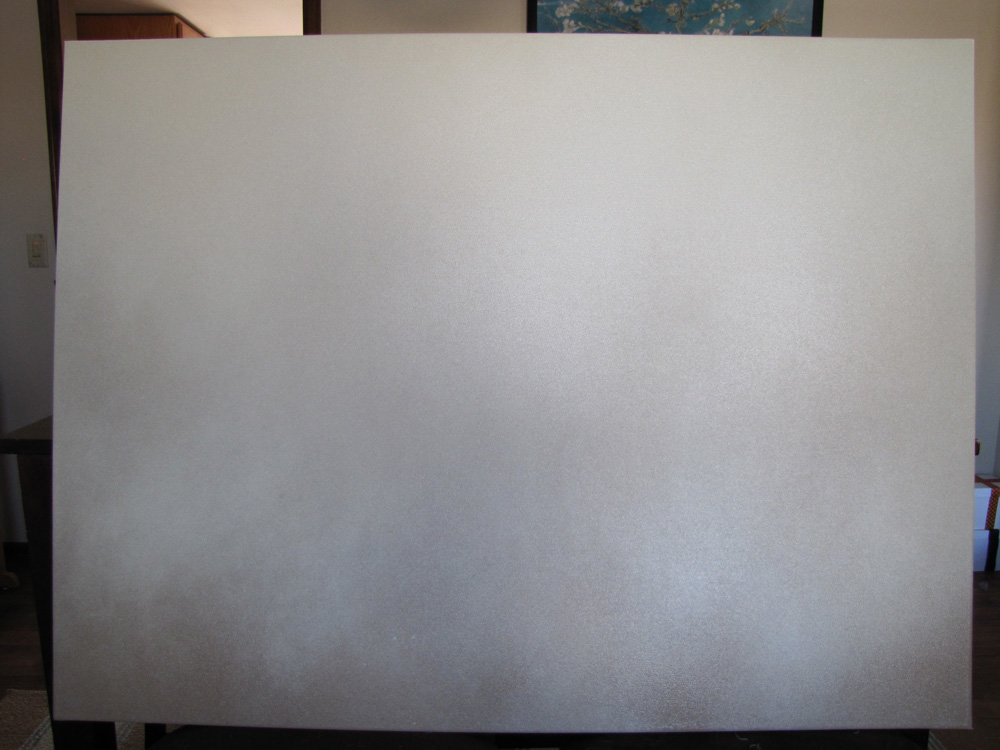
Next I needed to draw the branches. I did really well with this step.
Until…
I decided there was a space that could use a extra branch and for some reason instead of drawing another slightly flowing branch I drew a crazy straw branch. The more I tried to fix it the worse it got until the crazy straw branch looked like a thick crazy tree trunk dominating the left side of the canvas. I tried to ignore it but it was a wild and CRAZY branch! So I had to start the spray painting process over again.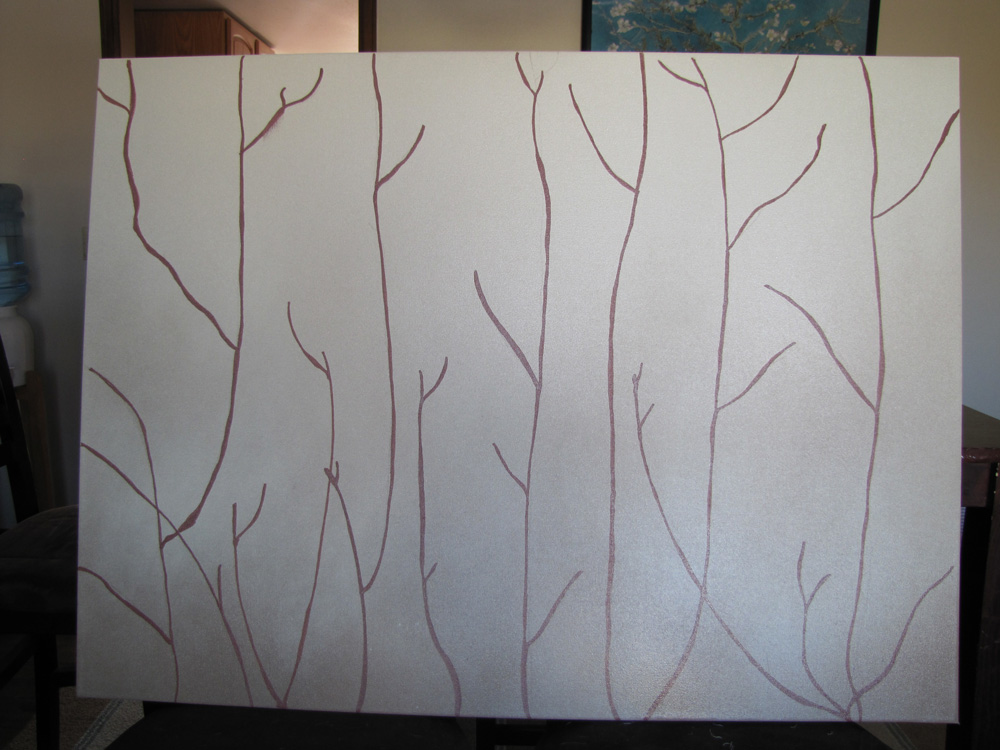
I tried to spray paint over my big mistake but I could see it underneath the spray paint like Poe’s tell-tale heart mocking my attempt to fill the gaping hole above my TV. Eventually, I had to admit defeat and buy another canvas which made me very cranky. It seems to be a recurring theme with these projects; they start out inexpensive and then slowly but steadily get more and more costly. I’ve convinced myself I will be able to use primer paint to save the canvas but that’s for another day. Anyway, new canvas, spray paint, and branches and finally it was time to start painting the dots. By now I was a nervous wreck so I went about the next step very very slowly.
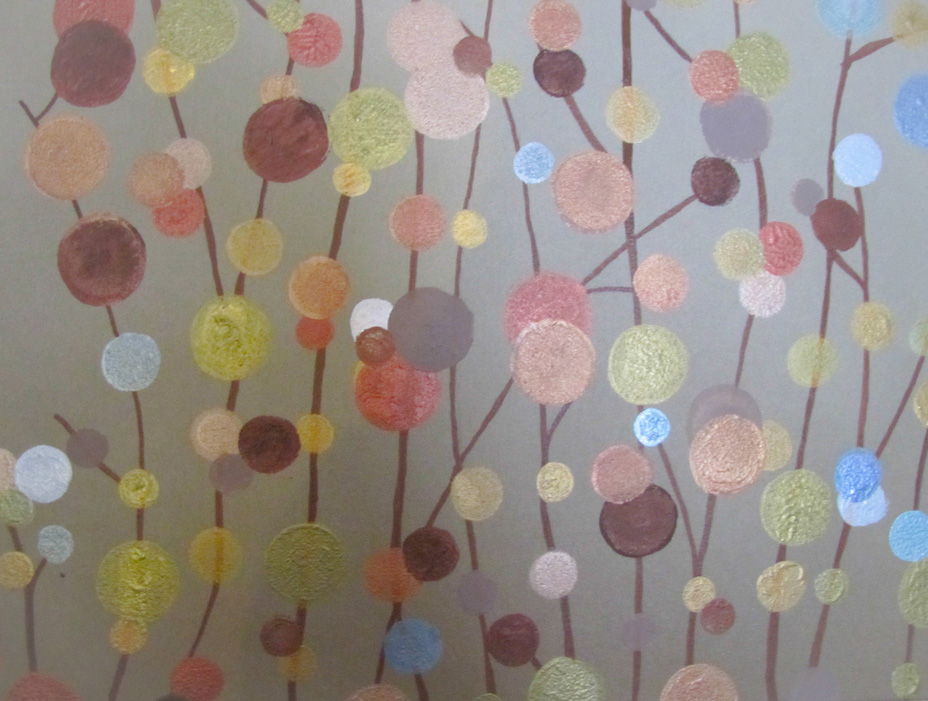
 I used the Martha Stewart Acrylic Pearl and Metallic Paint Set which came with 10 colors – Mint Chip, Aquarium, Jet Stream, Eclipse, Pink Taffeta, Fruit Punch, Tiger Lily, Yellow Gold, Gold, and Sterling. I also bought a few extras – Gazing Ball, Cornflower, Citrine Gold, Mother of Pearl, Rose Gold, and Rust. I used the Sharpie oil based paint pen and a brown Crayola colored pencil to draw the branches and three packs of sponge brushes to make my dots – the sponge brushes come in three sizes. Even with the three packs, I had to constantly rinse out the sponge brushes, wait for them to dry and reuse them with different colors. This was very annoying. However the packs were $5 each and I was determined to stay within some semblance of a budget. I suppose in a way it did help me pace myself and not go too fast which helped me avoid getting sloppy or hurried, but nobody likes rinsing out sponge brushes, let alone 15 times a day over the course of a three day project. I suppose what I’m saying is that if a budget is not an issue for you, buy lots of brushes.
Anyway, I was a nervous wreck because I had an idea of what my dots were going to look like and it was not good. One thing I have not mentioned is that I made practice canvas’s along the way. When I say that I lack artistic ability I am not joking. These were smaller cheaper canvas’s that I used to practice spray painting, drawing branches and finally the painting. I would say that up until the painting step I had felt ok – no encouraged by the results of the practice canvas’s… but when I tried my painting skills on the practice canvas…It looked like something you found at an estate sale of somebody who stopped shopping in the early 70’s. It also didn’t help that when my husband came home from work and saw the practice canvas…. well, he didn’t dissuade me of that opinion.
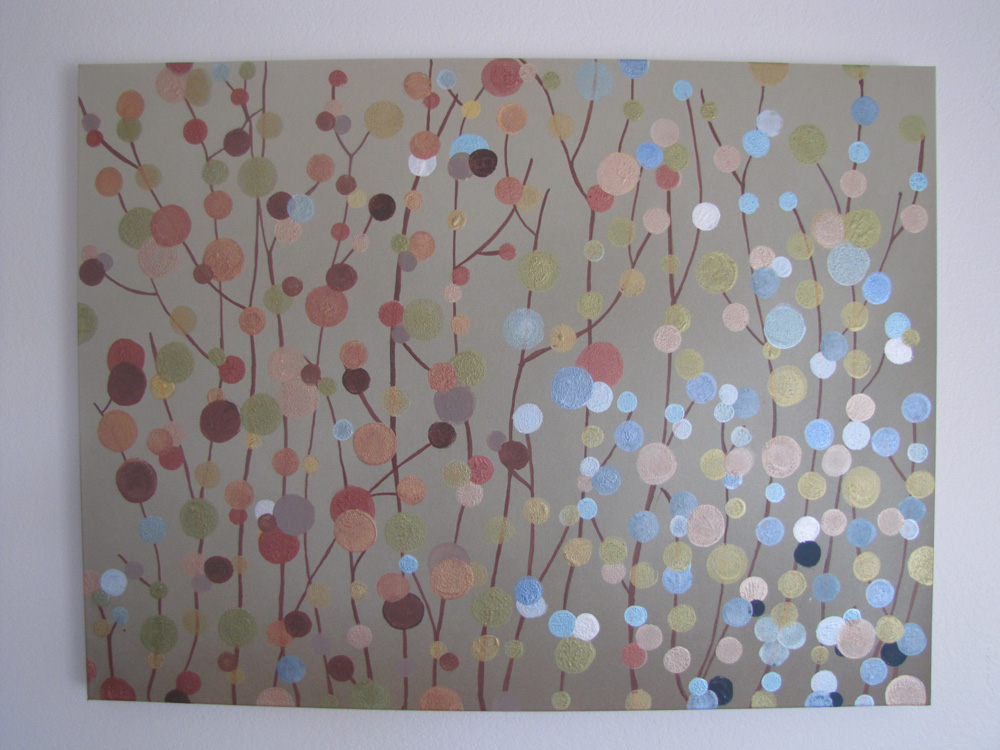
It took me about three days to paint the whole canvas. Originally I planned to just fill the canvas with random colors everywhere.
After the first day I noticed that even if I painted dots all over the branches that I’d drawn, it would have big gaps. So I filled in the empty spaces with more branches. I also decided that it would look better If instead of random colors everywhere, I placed the colors in a more balanced setting – Browns and golds on the left side and teals and blues on the right side. I also experimented with mixing some of the colors together so I would have more variety.
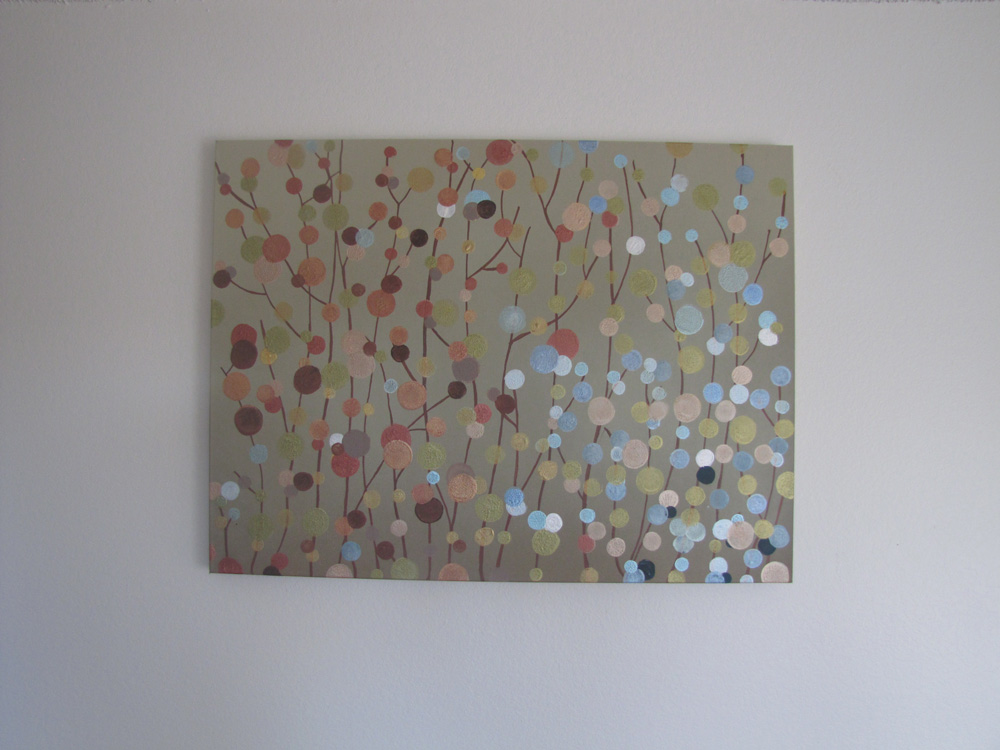
Finally I used the green as the main color through the whole canvas to draw the whole picture together. Again I stress that I am not an artist so this may look like crazy sauce but I like it and really, who gets to say what is art…right?
So that’s it… I think it looks pretty good. Oh and in case 70’s estate art is your thing…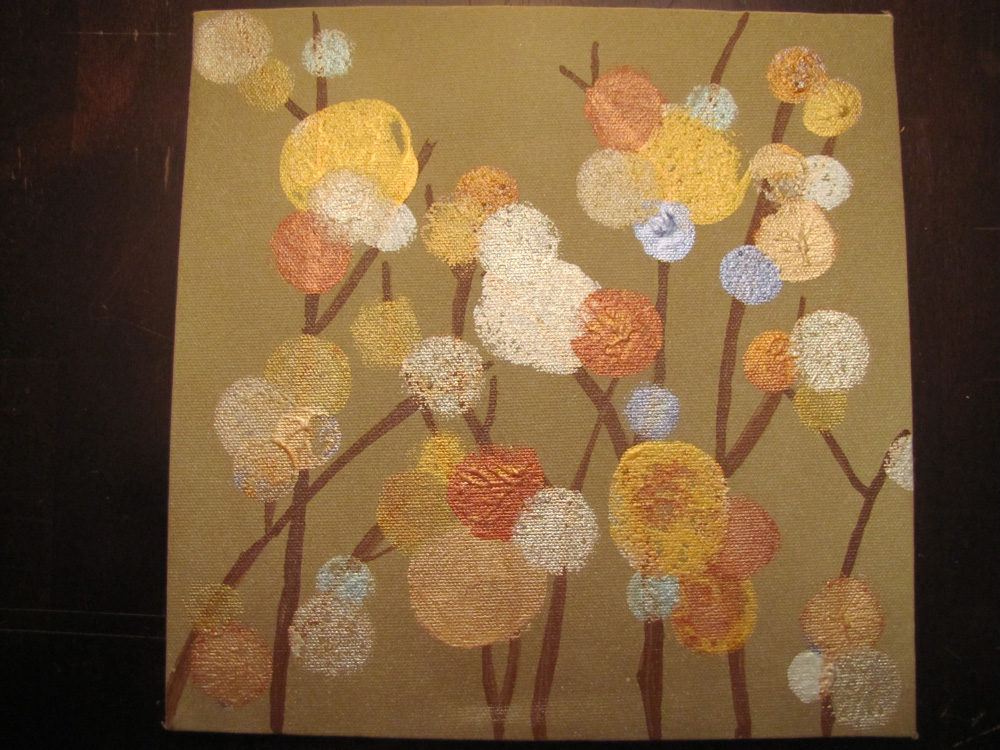
I like it!!
That came out awesome!!!!
That came out AWESOME!
yay! thank you 🙂 I like it too!
do you want the 70’s practice canvas? haha
Amy Janovicz Pulido liked this on Facebook.
Holly Baya liked this on Facebook.
M Colleen Hodson liked this on Facebook.
Pat Matthews liked this on Facebook.