

 When I saw this project I knew I wanted to make about 450 of them! My finished project wasn’t as polished as Gail’s, the original creator, but I still love them and can’t wait to send them out to my friends and family…
…especially with the little gift I put inside.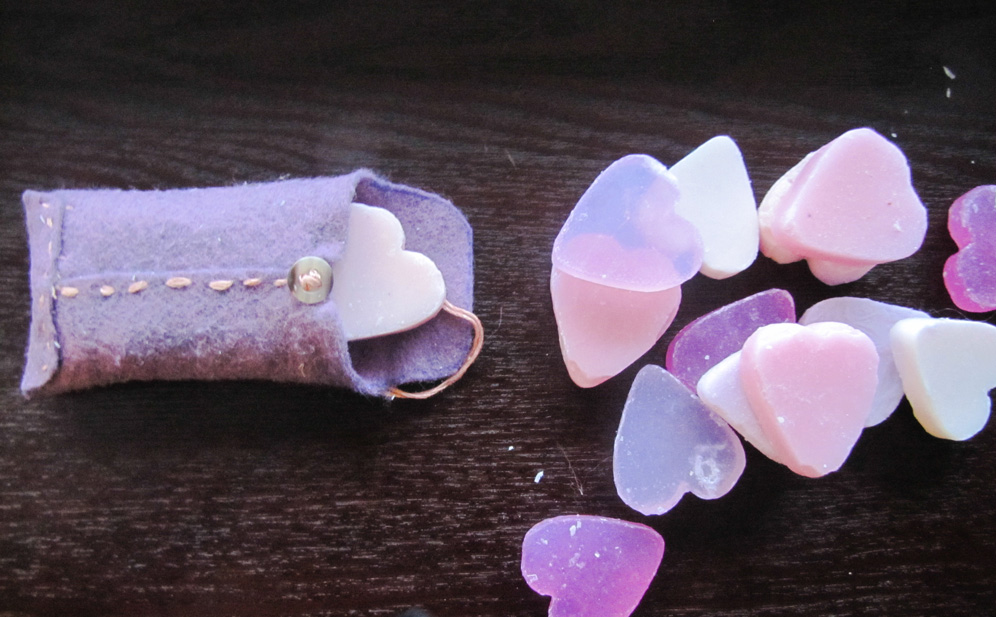
I used:
felt
embroidery thread
baby envelope template (purchase here)
canvas
Martha Stewart alphabet stamps
Martha Stewart heart craft punch
really big needle
scissors
iron
Felt
I learned a lot about felt making this project. The first thing you should know is that the felt you will find at Joann’s and Michaels is crap. You don’t want to use that felt for this project. It’s acryllic and almost transparent. You want wool felt or at least felt that has 20%-35% wool blend. Otherwise you will hate this project. I shopped online for my felt and from eBay. The price was great, the variety of colors was extensive and I got free shipping – which I couldn’t find at the other online felt stores.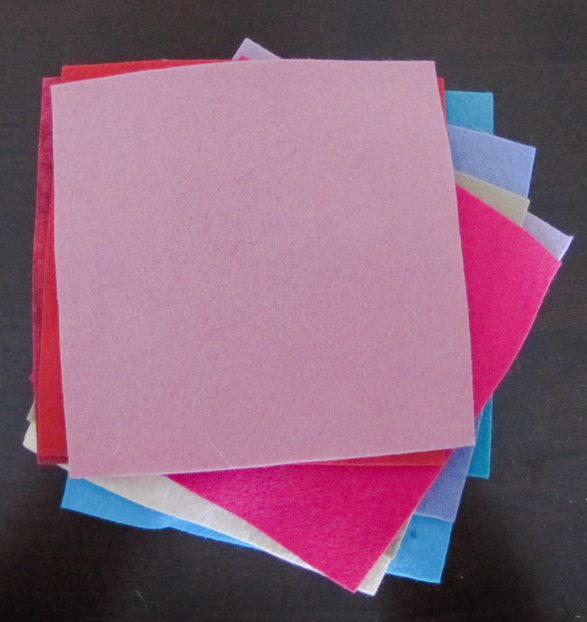
Thread
Gail recommended embroidery thread in contrasting colors. Thankfully, I had a plethora of DMC Mouliné Spécial 25 Six Strand Embroidery thread left over from my cherry blossom blanket.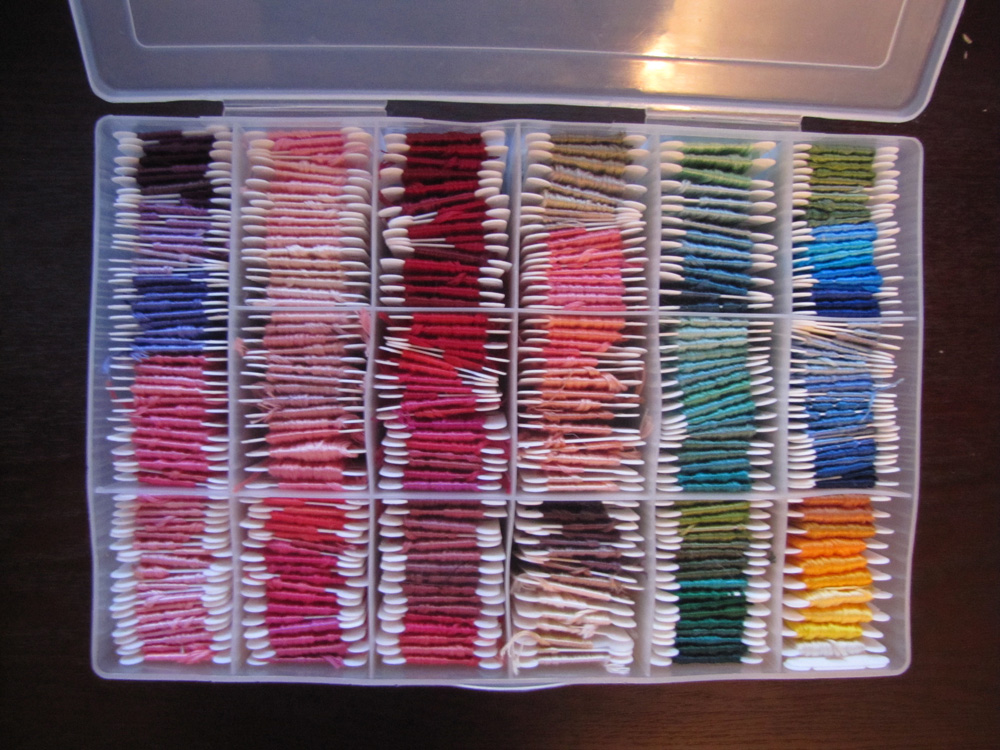
Prep Work
Heart
Once I got all of my supplies I spent about 5 hours deciding which color hearts to use with which flowers. Once I made the decision I started punching out the hearts. The Craft Punch is made for punching paper, the felt fits in but when you “punch”…you’re going to need to put your back into it!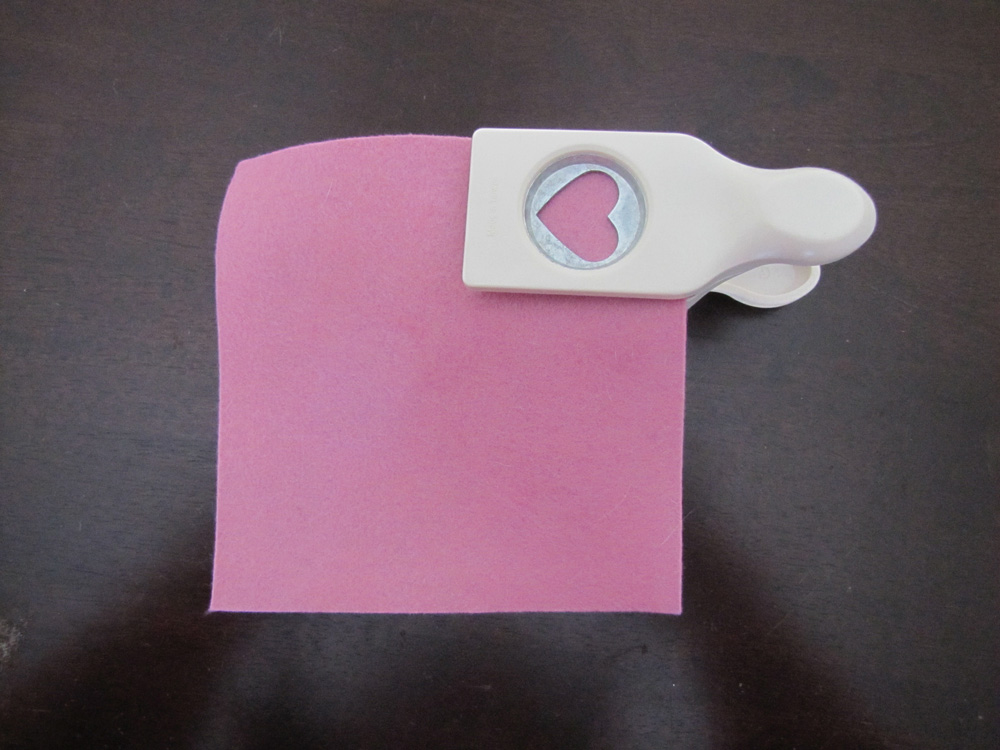
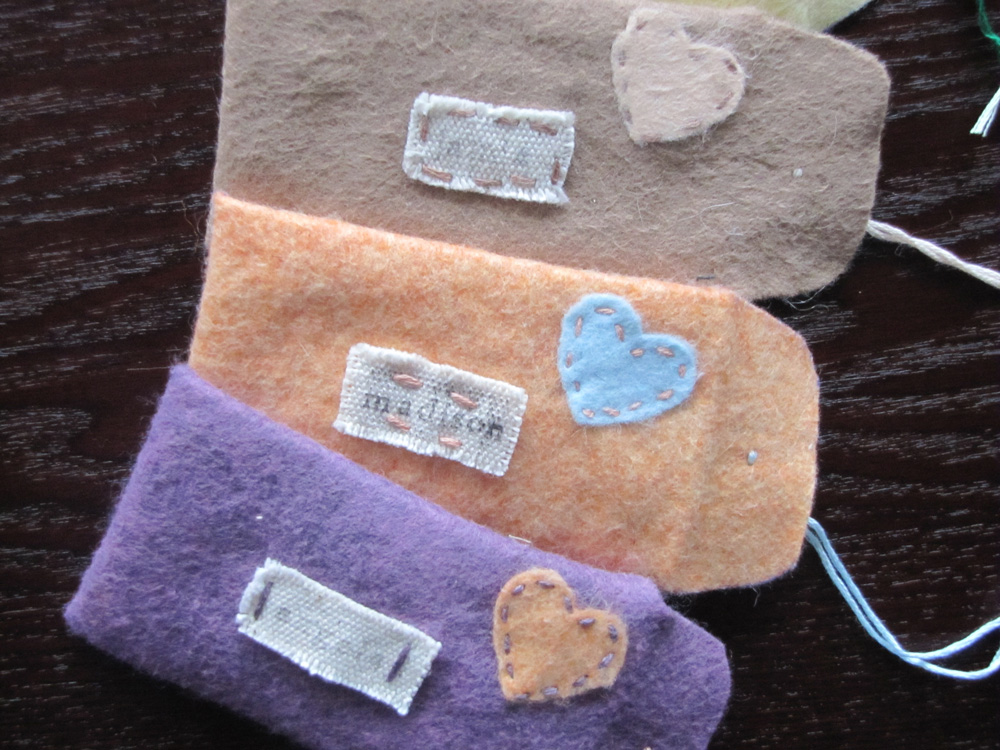
Canvas Name Plate
I bought some canvas at a craft store and the Martha Stewart Alphabet stamp set to make the name plates. I don’t know that much about canvas but the stuff that I bought had the consistency of string cheese and the stamp set was such a pain. I almost scrapped the whole name plate idea. I am definetely going to invest in a better alphabet stamp set soon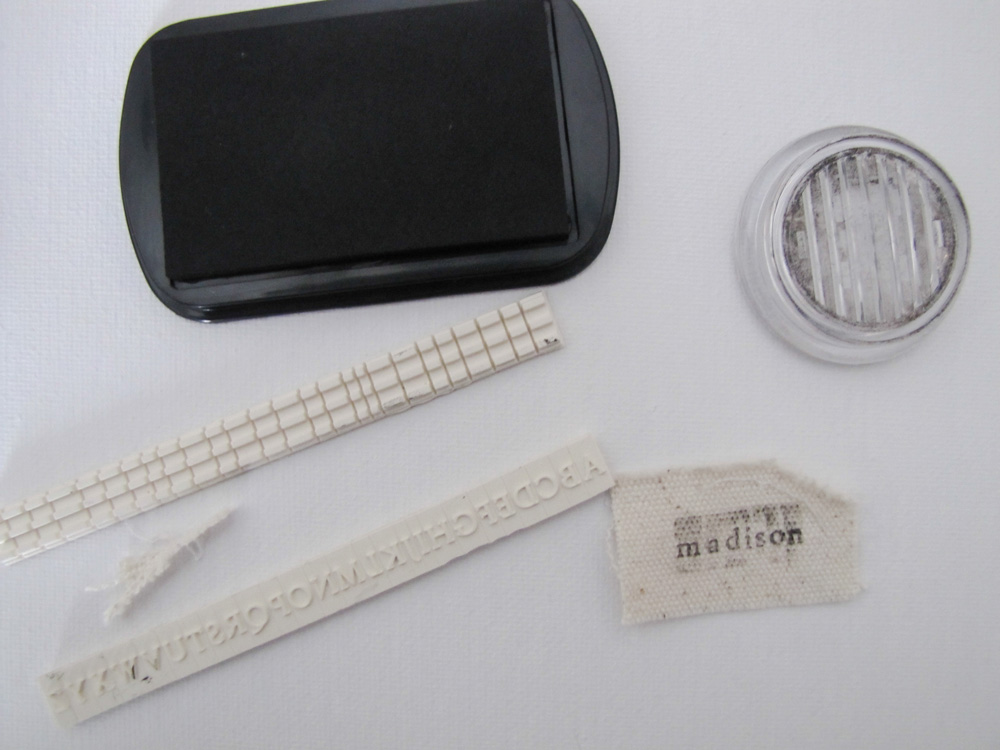
Baby Envelope Template
The Paper Source “baby” envelope template is made of thick plastic – measuring 2 1/8 inches by 3 1/2 inches. I traced the baby envelope onto the felt with a pen and then cut it out. My horrid cutting skills sure made each of these envelopes unique.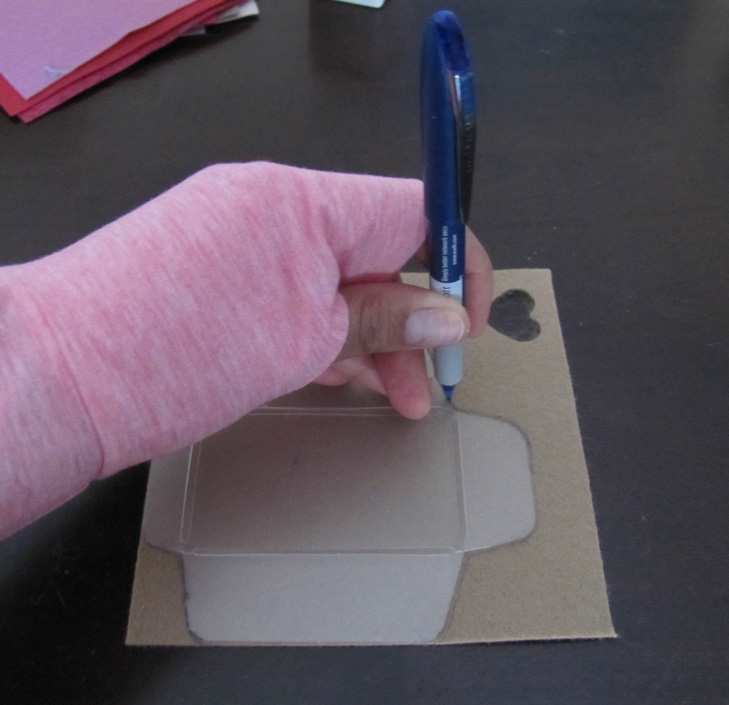
Seaming
Gail recommended that before you sew the envelope together you use a iron to “seam” the folds. It helps with sewing your pieces together as well as the next step.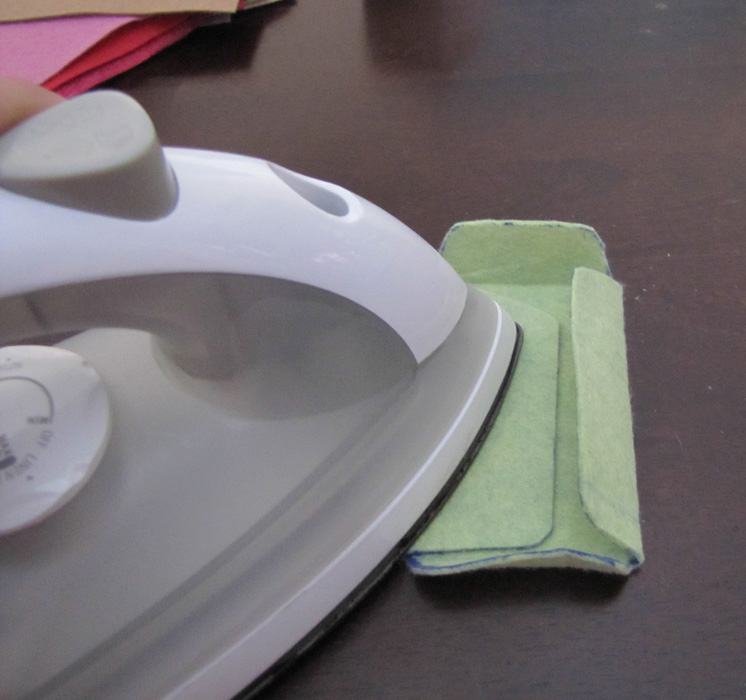
Sewing
Envelope Face
Next I sewed the heart and canvas name plates onto the face of the envelope. This was my favorite part of the process. I’m so glad I didn’t skip this step. The contrast stitching looks adorable.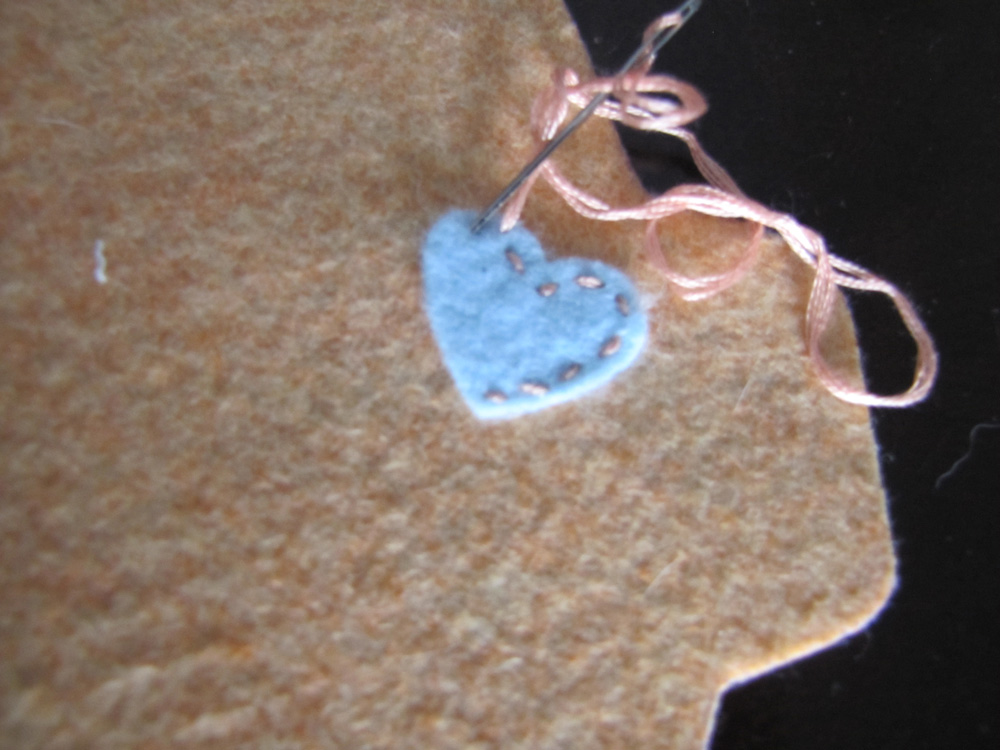
As I mentioned above it helps if you do this after you “seamed” your folds because you will have a better idea where the heart and name tag goes.
Flaps
I don’t really have any tips on this. I try to stay mum on area’s where I – well I suck. But it should look something like this;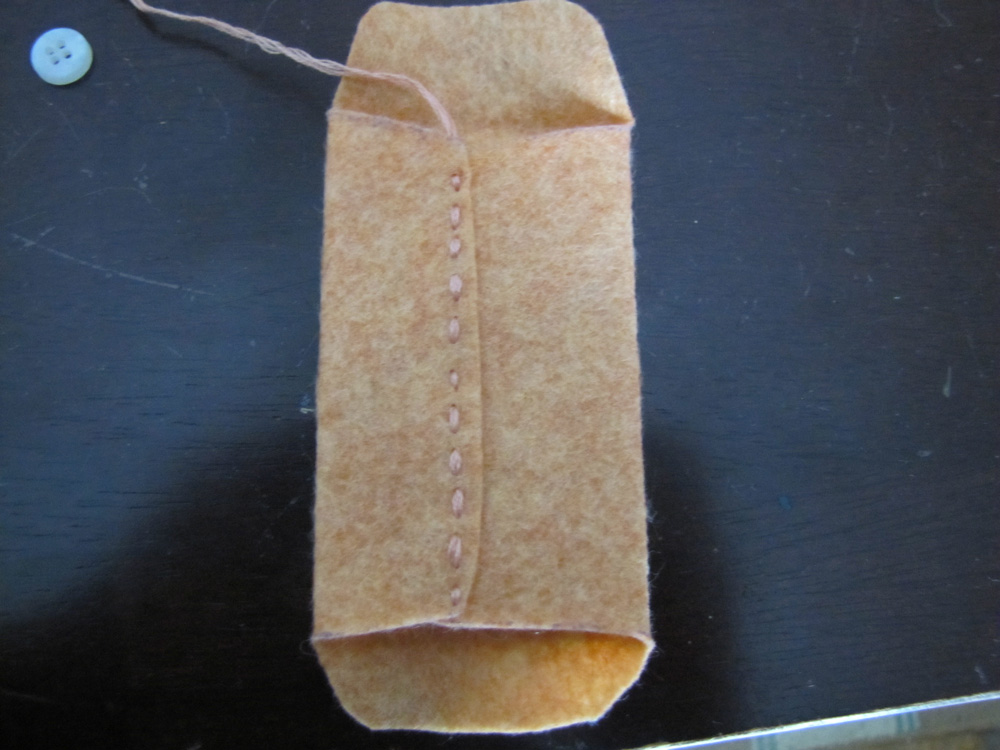
Button
Any time my husband retires a dress shirt he cuts the buttons off, so I had plenty of extra buttons to use. Adds a little “fancy” right?? 🙂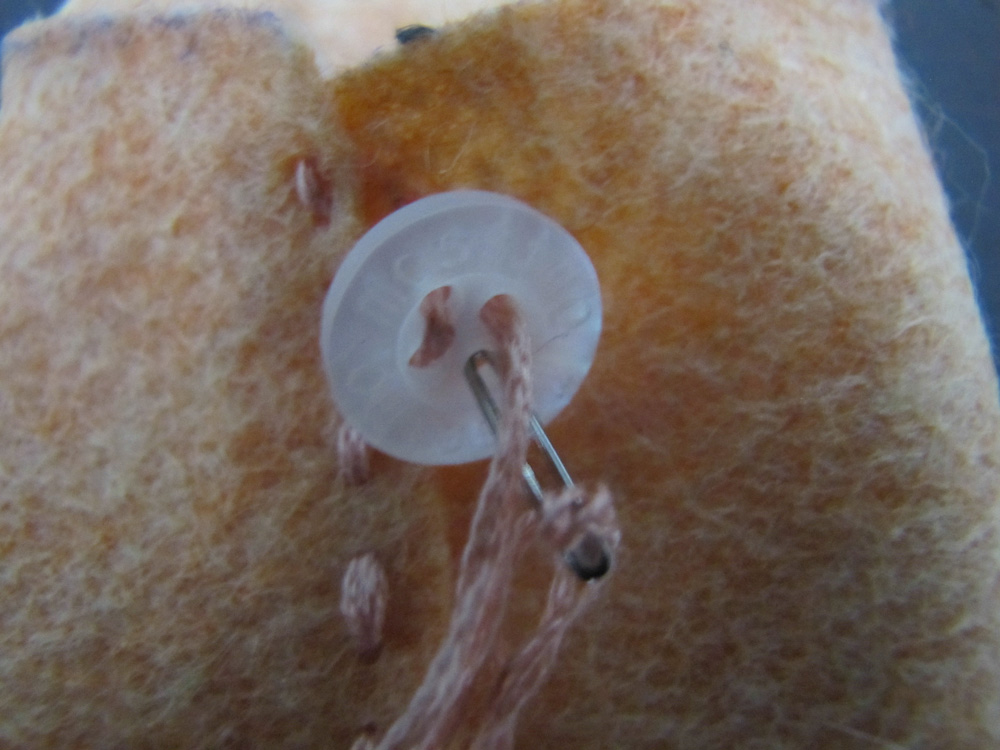 Tie-String
I folded the thread in half, slipped in through a needles and inserted it into the felt. then i drew the ends through the loop to make a slip knot thingy.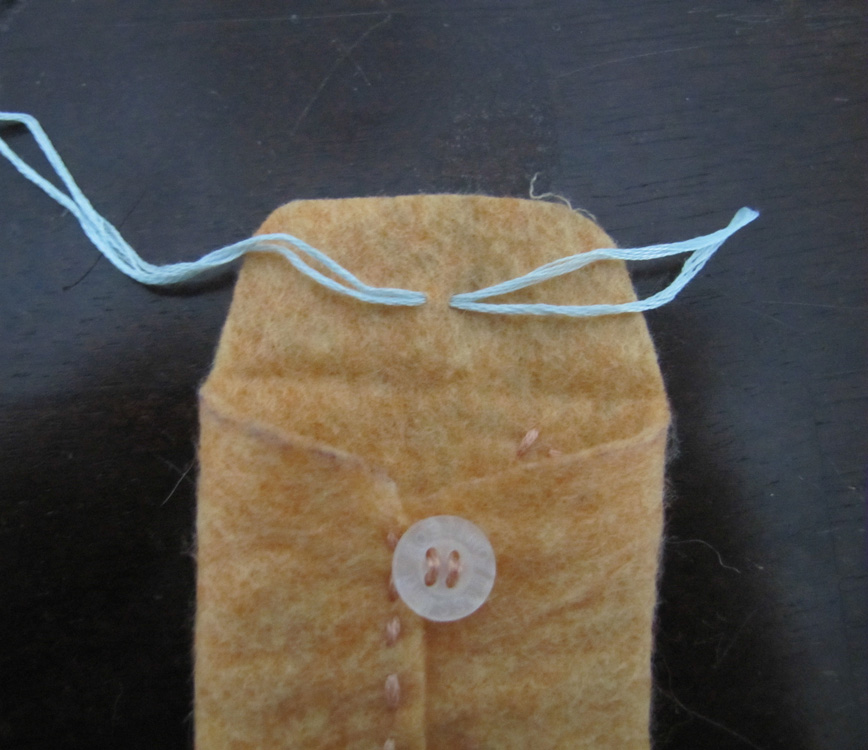
Add a Goodie
Gail put little cards inside, but I had my heart shaped soaps saved for this project. What did you fill your envelopes with?
Seriously. Open a shop already. These are too cute.
yours is in the mail! 🙂
Awww! So happy I made the cut! These are Soooo cute.
Amy Janovicz Pulido liked this on Facebook.